


As a supplier of 20 Pin SCSI cables, ensuring the quality and functionality of our products is of utmost importance. Testing these cables is a critical step in the manufacturing process to guarantee that they meet the highest standards and perform reliably in various applications. In this blog post, I will share the comprehensive process I use to test a 20 Pin SCSI cable.
Understanding the 20 Pin SCSI Cable
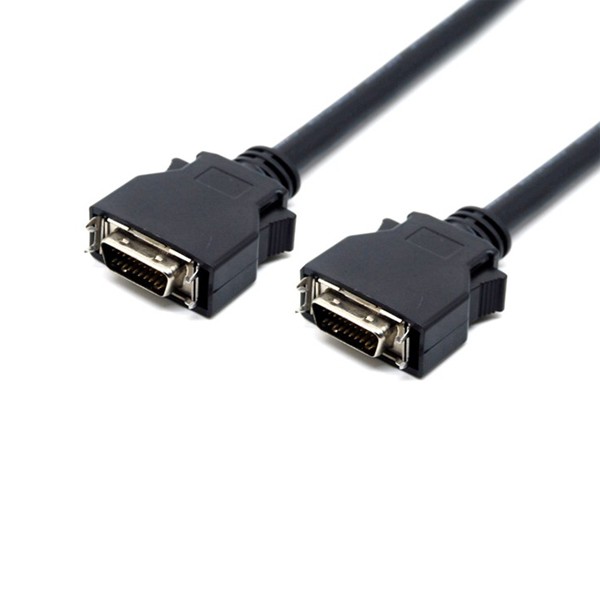
Before diving into the testing process, it's essential to have a clear understanding of what a 20 Pin SCSI cable is and its typical applications. SCSI (Small Computer System Interface) cables are used to connect SCSI devices such as hard drives, tape drives, and scanners to a computer system. The 20 Pin SCSI cable is designed to transmit data and power between these devices efficiently.
There are different types of 20 Pin SCSI cables available in the market, each with its own unique features and specifications. For instance, the SCSI 20 Pin Cable with Latch Clip offers a secure connection with its latch clip, preventing accidental disconnections. The MDR 20 Pin Cable Assembly is known for its high - density design, which is suitable for applications where space is limited. And the SCSI DB 20 Pin Cable with Screw provides a stable connection through its screw - based mechanism.
Pre - testing Preparations
The first step in testing a 20 Pin SCSI cable is to gather all the necessary tools and equipment. This includes a cable tester, a power supply (if required for testing power transmission), and a set of reference cables for comparison. The cable tester should be capable of measuring parameters such as continuity, resistance, and capacitance.
Inspect the cable visually for any obvious signs of damage, such as cuts, kinks, or bent pins. If any damage is detected, the cable should be rejected immediately as it may not function properly. Check the connectors for proper alignment and ensure that the pins are clean and free from debris.
Continuity Testing
Continuity testing is one of the most fundamental tests for a 20 Pin SCSI cable. It checks if there is a continuous electrical path between the pins at both ends of the cable. Using a cable tester, connect the test leads to each pin on one end of the cable and then check the corresponding pin on the other end.
The tester should indicate a low resistance (ideally close to zero ohms) if the circuit is continuous. If the resistance is extremely high or shows an open circuit, it means there is a break in the wire, and the cable is defective. Test each pin individually to ensure that all 20 pins have proper continuity.
Resistance Testing
Resistance testing helps to determine the quality of the conductors within the cable. Each conductor in the 20 Pin SCSI cable should have a consistent and low resistance. High resistance can lead to signal degradation and power loss, which can affect the performance of the connected SCSI devices.
Using the cable tester, measure the resistance between corresponding pins at both ends of the cable. Compare the measured resistance values with the manufacturer's specifications. If the resistance values are outside the acceptable range, it may indicate a problem with the cable, such as a damaged conductor or poor soldering.
Capacitance Testing
Capacitance is another important parameter to test in a 20 Pin SCSI cable. Capacitance can affect the signal integrity and the speed at which data can be transmitted through the cable. Excessive capacitance can cause signal distortion and delay, leading to errors in data transfer.
The cable tester should be set to measure capacitance. Measure the capacitance between each pin and a reference ground. Compare the measured capacitance values with the recommended values for the specific type of 20 Pin SCSI cable. If the capacitance values are too high, it may be necessary to investigate further to identify the source of the problem, such as improper cable shielding or a faulty conductor.
Signal Integrity Testing
In addition to the basic electrical parameter tests, it's also important to test the signal integrity of the 20 Pin SCSI cable. This can be done by connecting the cable to a SCSI device and a computer system and running a series of data transfer tests.
Use a SCSI diagnostic tool to send and receive data through the cable. Monitor the data transfer rate, error rate, and any other performance indicators. If there are frequent data transfer errors or a significant drop in the data transfer rate, it may indicate a problem with the cable's signal integrity.
Power Transmission Testing (if applicable)
Some 20 Pin SCSI cables are designed to transmit power in addition to data. If the cable is a power - transmitting type, it's necessary to test the power transmission capabilities. Connect the cable to a power supply and a load device.
Measure the voltage and current at both ends of the cable. Ensure that the voltage drop across the cable is within the acceptable range. A large voltage drop can indicate a high resistance in the power conductors, which can lead to insufficient power being delivered to the connected device.
Environmental Testing
To ensure the reliability of the 20 Pin SCSI cable in real - world applications, environmental testing is also crucial. Subject the cable to different environmental conditions such as temperature, humidity, and vibration.

For temperature testing, place the cable in a temperature - controlled chamber and expose it to both high and low temperatures. Check the cable's performance after each temperature cycle. High temperatures can cause the insulation to degrade, while low temperatures can make the cable more brittle.
Humidity testing involves placing the cable in a high - humidity environment for a certain period of time. Check for any signs of moisture ingress, which can cause corrosion and short - circuits. Vibration testing can be done using a vibration table to simulate the vibrations that the cable may experience during transportation or in a working environment.
Final Inspection and Documentation
After completing all the tests, perform a final visual inspection of the cable. Ensure that all the connectors are still in good condition and that there are no signs of damage that may have occurred during testing.
Document the test results for each cable, including the test parameters, measured values, and the pass or fail status. This documentation is important for quality control purposes and can also be used to provide evidence of the cable's performance to customers.
Conclusion
Testing a 20 Pin SCSI cable is a comprehensive process that involves multiple steps and tests to ensure its quality and functionality. By following the procedures outlined above, we can guarantee that our 20 Pin SCSI cables meet the highest standards and perform reliably in various applications.
If you are in the market for high - quality 20 Pin SCSI cables, we invite you to contact us for more information and to discuss your specific requirements. Our team of experts is ready to assist you in finding the right cable solution for your needs.
References
- SCSI Interface Standards Handbook
- Cable Testing and Quality Assurance Guidelines for Electronic Cables